by Stan Logan | May 8, 2022 | Container plants
How do you tell when a potted plant needs repotting? There are several clues. Perhaps your soil moisture tester is no longer able to penetrate the soil. Maybe your plant has to be watered every day. You may find that the water you add to the pot takes forever to soak in.
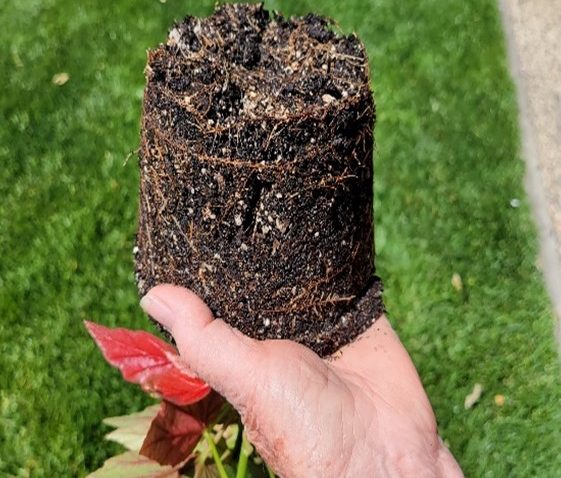
The sure way to find out is to pop the plant out of its pot. When the pot is small this chore is easy—simply turn it upside down and rap the edge of the pot on a hard surface like your potting bench. Don’t forget to have your hand beneath the plant to catch it when it falls out! Now check the roots. If they are crowding around the edges, it’s time to repot. Now if you have a larger pot, simply get a strangle hold on the basal neck of the plant and tap the top of the pot. We find a rubber mallet works well with this, but a short piece of wood like a 2 x 4 would work.
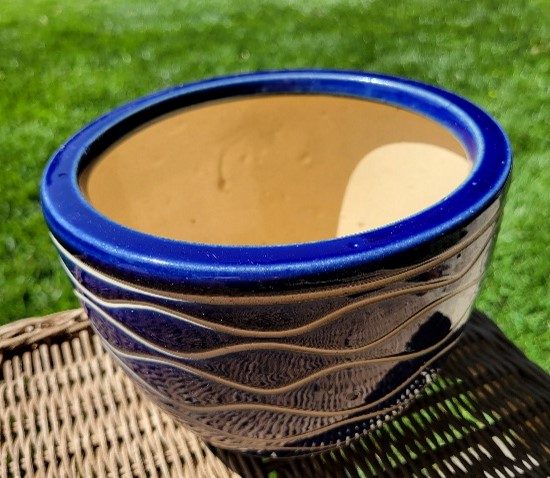
If you have a plant in a pot that has a constricted top like in the photo below, you have a problem. When you plant in such a pot, repotting will be a real chore. Your two main options are to cut down through the roots all around the periphery with a narrow blade, or you could simply break the pot. A third option is simply to let the plant die a slow, agonizing death. Of course, you could shorten the demise with a quick severing with a pruner. Then you are merely left with the struggle to remove the impacted remains.
Now once you perfect plant popping technique, you may consider using it while checking out the condition of a plant at a nursery before purchase. It would not be wise to invest a great deal in a plant that has been kept in the same pot too long and is now root bound.
LaVille is a professional propagating plant popper and uses this technique constantly to tell when a plant needs repotting. With a little practice you could be a proper popper too.
Stan, The Popper Man
by Stan Logan | Feb 20, 2022 | Container plants
|
Many of you have really large flowerpots. If your pots are narrower at the opening, you have a problem when it comes to removing the plant. If you want to save the plant, extracting it from its vessel can be difficult. One solution it to break the pot—not the ideal option. Now if you don’t care for the plant, the chore of removing it and the soil can still be difficult. I have written you before about using a soil auger, and that will work.
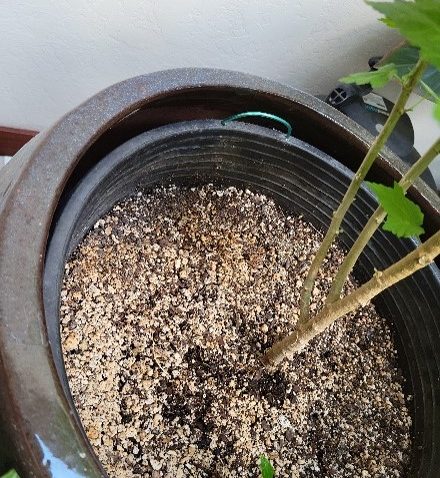
Another option you might consider is planting your valued plant in an inexpensive plastic pot—one that is tapered for easy plant removal. The plastic pot can be raised to the desired height with wood blocks, bricks, or rocks placed beneath it. This also creates room for water run off if your large pot has no drainage holes. You can see in the photo I have drilled two holes in the rim of the plastic pot and inserted wire to make handles that will allow me to lift the pot out.
There are so many beautiful large planters out there at nurseries. I can see how you would be tempted to buy one that narrows at the top. Please consider using a second pot inside—call it pot insurance.
Stan, The Pot Man |
by Stan Logan | Feb 19, 2022 | Container plants, Garden tools, Propagation
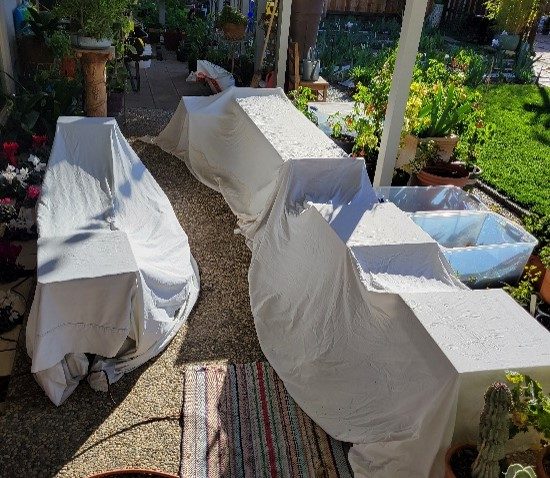
With the advent of a freeze forecasted for the 22nd, I thought it timely to remind you to protect your tender plants. Although there are special sheet-like products available, old bed sheets will work fine. Got no old sheets? Then plan on going to estate sales. They are a sure find. In the photos below I have placed old X-mas tree lights (estate sales again) beneath the sheets. These maintain a temperature above 50 degrees through the night to protect the abutilon seedlings that are growing for future sales. If you plan on using plastic sheeting, don’t let the plastic touch the plants.
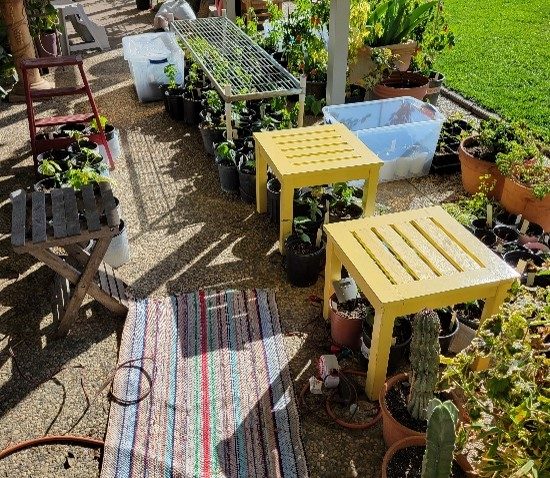
I just went outside to take a photo of the plants that the sheets were protecting. The abutilons have really grown well through the winter for the last 3½ months since cutting. We lift off the yellow tables each morning. A timer controls the lights, and that rug is a deterrent from tripping over the cords. The south exposure creates an extra 10 degrees of air temperature, and the pots most exposed to the sun are wrapped with white bubble wrap.
Stan, The Propagation Systems Manager Man
by Stan Logan | Feb 18, 2022 | Container plants, Irrigation
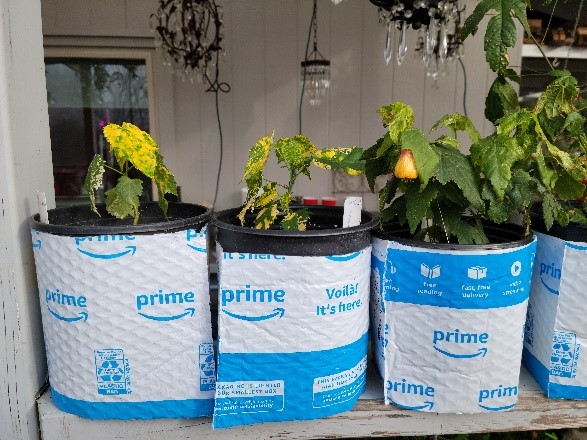
| Growing plants in those ubiquitous black gallon pots can pose a problem. Some plants prefer full sun exposure. However, intense sun rays are absorbed by the black plastic surface and converted into heat. When the planting soil within get hot, root damage results. One solution to this dilemma is to line the insides with bubble wrap. A much easier solution is to shield the outside. I have found the perfect heat barrier. Amazon sends a lot of its items in white bubble wrap pouches. The most common size they use fits around a gallon pot perfectly. If you cut the bottom off and cut the height in half to about 6 ½ inches, you will create tubes that will easily enclose two pots, keeping them cool, and yet allowing the full exposure of the sun to your happy plants. This technique creates a reusable shield that will postpone recycling and most certainly prevent deposit in the local landfill. If you are receiving Amazon Prime delivery pouches and have no use for them, we could certainly use them. LaVille, for instance, transferred 30 abutilons into gallon pots today. However, LaVille says I can’t order more stuff from Amazon just to get more bags.
Stan, The Reusing Man
P.S. I measured the temperature of the soil 1 inch from the edge of a shielded and an unshielded pot today at 3 PM. Shielded – 74 degrees Unshielded – 94 degrees. These are the results at the end of January. Imagine the results in August!
P.P.S. If the sight of all the advertising bothers you, turn the tubes inside out, but I’m not sure the shields will be as effective. I’ll test that out tomorrow and send you another email if there is significant difference. |
Bubble-wrapped pots |
| |
|
by Stan Logan | Jan 26, 2022 | Container plants, Garden tools
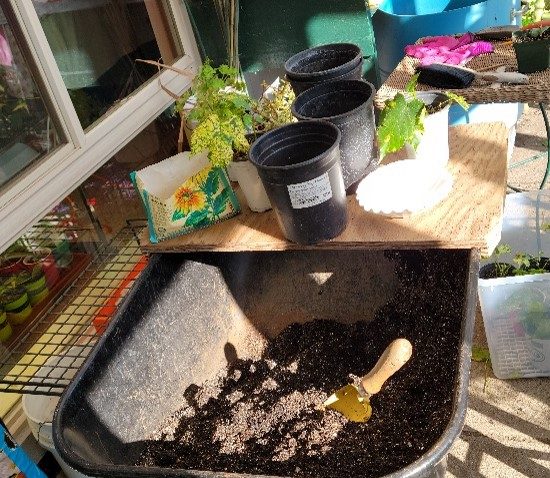
Here is an addition to your potting shed that is not new, but one that is new to us. LaVille was complaining about a sore back after working for long periods of time repotting plants. She was having to bend down into the blue half barrel that you can see in the upper part of the photo to scoop up potting mix. I turned our wheelbarrow, which is seldom used, into a potting station by cutting an old piece of plywood into a work surface and adding cleats to keep it in place atop the wheel barrow handles. Now LaVille can sit on a medium height stool and do her potting without bending over.
Wood tops wheelbarrow handles to form surface for potting plants.
The potting soil is a mixture of RediGro potting soil, perlite, vermiculite, and worm castings. Note the trowel that I have painted yellow (I hope you know why.) and the bag of Sure Start (which I have yet to discuss). The white coffee filters are to block the holes in the bottoms of the pots. The plants coming out of the quart white pots are variegated abutilons—my favorites.
I was surprised to find that we only have about 20 empty gallon pots remining. I never thought we would come close to using up the supply that I gleaned from the returned stack at Redwood Barn Nursery. I counted up the number of potted gallon pots around the yard and came up with 145.
If you would like your own portable propagation potting station, email me the greatest width of your wheelbarrow and I will cut you a work surface that will make this garden chore even more enjoyable.
Stan, The Tool Man
by Stan Logan | Jan 15, 2022 | Container plants, Garden tools, Irrigation
You know, it’s not easy coming up with a new tool to write about, but I am really excited about this one. As soon as I saw LaVille use it, I just knew there must be at least two other gardeners out there who would appreciate this one. If you are like my wife, she uses a watering wand almost daily. You see, she has probably around 100 potted plants that are under cover outside that don’t get the benefit of rain showers. So even in the winter, a watering wand is used regularly. The last wand was good—until it wasn’t. A crack appeared in the side of the aluminum shaft that caused LaVille to get sprayed along with the plants. I found that applying J-B Weld epoxy to the area, and wrapping with electrician’s tape sealed the leak. LaVille was still unhappy because . . . well, the wand was too long, the control valve was sticking, and the spray was irregular.
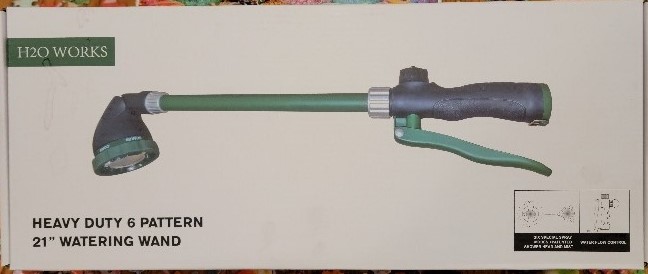
So I went to Amazon and ordered what you see below. This, in her opinion, is the perfect watering wand. Adjustable sprays, adjustable head direction, full and fine spray, and a short handle which can still reach higher up hanging plants and water a potted plant held in the other hand. (The full spray is emitted from around 200 minute holes!)
If you cannot read the description from the photo, I am talking about “H2O heavy duty 21 inch Watering Wand” from Amazon.
Happy watering,
Stan, The Tool Man